|
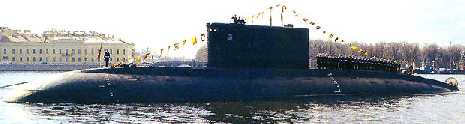
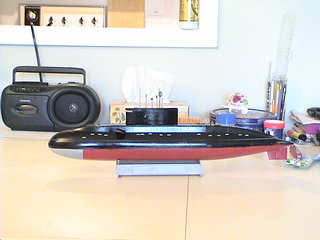
Picture of a Russian Kilo submarine in harbor, these small diesel subs are the last of their class operational in the
Russian Navy.
- A brief moment of history... story about the real boat.
"The Volkswagen of diesel submarines" as Tom Clancy said himself, the Russian Kilo class diesel-electric attack submarine
(SSK) is one of the quietest subs of its genre. Entered in service in the early 80's, it has been imported to several
countries such China and India today. The early Type 877 EKM was constructed at the Komsomolsk shipyard but they are
now constructed at the Admiralty Shipyard in St. Pertersburg (formely Leningrad). The Type 636, also called the Improved
Kilo, is advanced with its quick torpedo loading system and it's silent and stealth. The Kilo class boats are used in
both Anti-Submarine Walfare (ASW) and Anti-Surface Ship Walfare (ASuW). The Kilo class sub is a compact little boat
and quite the balance between conventional and man power.
Sources: Tom Clancy's Submarine, Berkley Non-fiction 1993/2002
Kilo class Type 877/636
Displacement: Surfaced: 2,325 tons/Submerged: 3,076 tons
Dimensions: Lengh: 74.3m Beam: 10m Draft: 6.6m
Armament: Six torpedo tubes located at the front with 18 weapons.
Propulsion: Diesel-electric drive, the type 877 EKM has a six bladed prop, the type 636 has a seven bladed prop.
Speed: 17 knots submerged.
This kit constains markings for the Kilo SSK Type 636
Lengh: 511.1 mm, roughly, 19.1 inches
Width: 96 mm (including the lengh of the diving planes) about 4 1/8 inches
Height: 147 mm (including the periscopes and antennas) about 5 7/8 inches.
1/144 Trumpeter Kilo Submarine
Review
I ordered this sub at the beginning of May and got it just
a week (May 18th) ago, I started construction almost right away due to my curiosity. My plan for this sub this summer is to make it a static diving, fully operational RC-sub. Heres my review.
Upon
entering the house I noticed the LARGE packed shipping box, I thought that the model box inside would be approximately the
same size but boy was I wrong! Inside the shipping box was paper, tons of it
and right in the middle was this 28X12 inch box, you guess it, this was the actual model box, 4 times smaller than the packing
box! All right, enough about mentioning about the word box. Military Hobbies did a great job packing this model, I would have given the shop a 5/5 if it wasn't for
the delivery time.
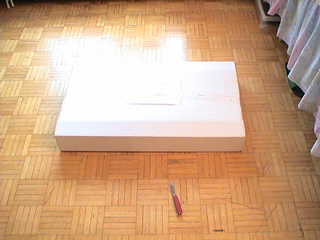
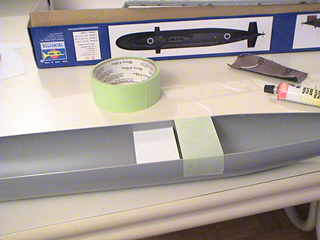
| Above: actual packaging |
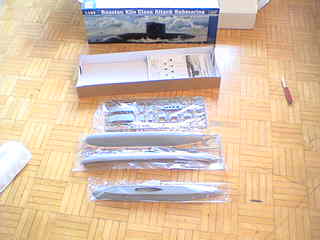
|
| Above: layout of model parts and sprues. |
After opening the model box itself I noticed the neatly packed hull and parts, there were 53 in total. Trumpeter had drawn the model colours on the box to show the good work. The bottom hull was split in half along the vertical axis, gluing them together was a snap. The rudder and other parts were molded on sprues. The instruction
sheet was clearly written and easy to understand there were 6 pages in total.
·
Construction
Since I am making the sub for RC operation, modifications had to be made on the control surfaces to allow
linkages to pass and connect them. I did this by burning a hole in the rudder
and diving planes and inserting a copper rod inside, I used sandpaper to even the rough surfaces out. Then, glued them on
with quick drying cyacnoacralite glue. Putting the pieces and linkages all together
was really tricky, you have to at least get some glue on your hands after this step!
|
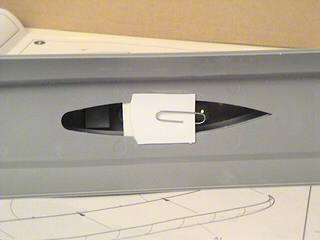
| Picture showing modified rudder with copper wire |
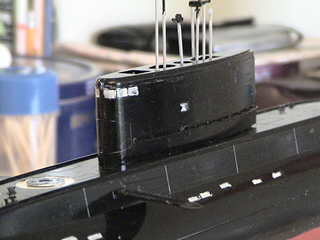
The conning tower was glued in
place using Lepage 5 Flexible Plastic Adhesive, I must say this sub is really going well!
After I did a dry fit with upper and bottom hull I noticed a fit problem, the bottom hull tends to "spread apart" to
the side while the upper hull tends to drop inside. Later that night, I fixed
this problem by using a piece of 0.30 inch styrene sheet glue to the side of the bottom hull, holding them together.
|
| brace work using styrene, I used masking tape to hold the hull in place while the glue was drying |
The deck details couldn't be simpler, just glue and stick. Trumpeter's
plastic quality was excellent, any rough or uneven surfaces can be fixed using sandpaper.
The periscopes and masts were glued together using Testors' model cement and so is the railing along side the conning
tower. To sum up the construction, I finally decided to make the conning tower
removable, that is to say that I can remove it at will to make transportation easier, several methods were suggested but I
found the best way by gluing pieces of styrene on both the upper hull and the bottom of the conning tower and attached them
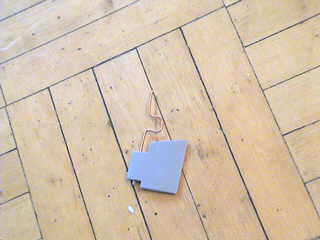
with a paper clip, it was easy and the conning tower stayed in place as if I've really glued it on.
|
| This one of my favourite bits, picture showing styrene attachment, using a paper clip as a holder. |
· Painting/Detailling
I used Gunze Sangyo's Aqueous Hobby Colour for this job, the problem with this model is that the middle
line is not marked. Therefore painting the upper part of the sub and the bottom
part along the missing middle line was going to be a challenge. Luckily, a solution
was found by attaching masking tape roughly along the middle line and painting the black colour on the hull above, all I have
to do to have a clean joint is remove the tape and voila! Unfortunately, some
of the paint sunk in the tape and left some marks but I covered them up when I applied the red paint on the bottom hull. After a night's exhausting work, I closed and shut down the hatches and went to sleep...
|
| Masking tape used to help and paint the hull |
|
| My painted Kilo, the tape method was really working and I got a clean joint. |
|
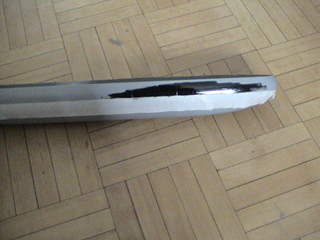
| Conning tower close-up. |
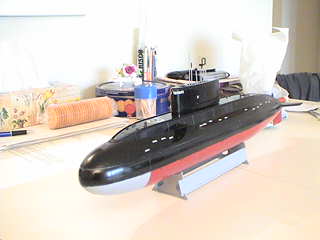
· Conclusion
and later improvements
The Trumpeter Kilo Kit is an absolute fantastically
looking model when completed. This is absolutely one of my favourite subs of
all times, the only problem was the fitting of the hulls and the rough stern diving planes movement it seems that I havent
sanded them enough, after that error, I decided to make the bow planes movable instead of the back ones. I will be making the WTC these days and continue on this quest. To
all, the Trumpeter Kilo kit is an absolute recommendation to both experienced and beginner modelers, if you are just starting
out in hobby and want to buy something affordable and good lasting, converting a Trumpeter Kilo into RC is THE way to go!
- Trumpeter Kilo Updates as of 24/06/04
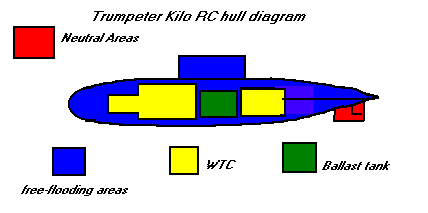
I've recently drawn the WTC (Water Tight Cylinder) layout for my sub. Picture above, you can see the different
areas of the inner hull, I have the ballast tanks (you'll see why I mean by tanks in the next picture) installed at the
center of gravity, the WTC section in front of the ballast tanks with contain the necessary diving gear, the
receiver in the very front, motor compartment in the back, and also the rudder necessarities in the front. Space is
the greatest challenge because you have to calculate exactly where to put things or else......
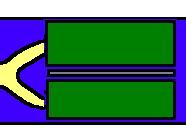
Ballast tanks diagram above, as you might remeber earlier on this page, I mentionned that the Kilo's hull kept on
spreading apart at the widest point, I then attached a piece of styrene the brace the hull halves. This caused a problem
because installing the ballast tank at the center of floatation will be difficult, to solve that problem I simply used two
tanks instead of one, one atop of each other. A flexible tube links the two tanks together, it then travels to the pump.
I say pump because my Kilo is using a pump ballast system that allows static diving (or almost static diving) capabilities.
The pump empties the tanks again and again to make the sub surface or dive.
|